Support the Timberjay by making a donation.

A bug-free hideaway
Here in the North Country, a screen porch can make all the difference on a summer evening
No matter where you are in the outdoors in the North Country this month, you’ve probably noticed that mosquitoes are, well… everywhere. While the weather has been pleasantly summer-like, …
This item is available in full to subscribers.
Attention subscribers
To continue reading, you will need to either log in to your subscriber account, or purchase a new subscription.
If you are a current print subscriber, you can set up a free website account and connect your subscription to it by clicking here.
If you are a digital subscriber with an active, online-only subscription then you already have an account here. Just reset your password if you've not yet logged in to your account on this new site.
Otherwise, click here to view your options for subscribing.
Please log in to continue |
A bug-free hideaway
Here in the North Country, a screen porch can make all the difference on a summer evening


No matter where you are in the outdoors in the North Country this month, you’ve probably noticed that mosquitoes are, well… everywhere. While the weather has been pleasantly summer-like, it’s hard to enjoy spending time on the patio or porch if the bugs are eating you alive.
Mosquitoes can quickly put an end to plans for an outdoor meal or drinks with friends on a nice summer evening. That’s where a screen porch can make all the difference. A covered screen porch is the perfect blending of indoor and outdoor space and it’s almost a necessity for North Country residents, especially for those who don’t live in town where mosquitoes are more tolerable.
In thinking about a screen porch, there are really two general types, attached or unattached.
The gazebo is the classic unattached screen porch and they’re pretty common in the area, often tucked down close to lakeshore.
You can buy screened gazebo kits from some of the big box home center retailers that can make the construction process much faster and easier. Finding a good level location, maybe with a pleasing view, and establishing a stable foundation are the keys to making such a project a success.
You can erect a gazebo on a wooden deck, pavers, a concrete slab, or treated posts, as long as you have the ability to screen off everything. Don’t forget that mosquitoes and other insects will take advantage of even small openings to get inside. If you’re planning to use a wooden deck as a foundation for your gazebo, be sure that the decking provides a continuous floor. While a typical deck includes spaces between boards to allow rainwater to drain, those spaces are plenty large enough to allow mosquitoes to enter from underneath. A good solution is to apply a layer of screen to the top side of your deck joists before attaching the deck boards, and that’s sound advice for an attached screen porch as well.
If you’re thinking you’d like to enjoy an occasional meal in your gazebo, you’ll probably want to locate it close to your house. That way, you won’t have far to go if you’re having to schlep all your food, plates, glasses, and eating utensils, or if you need to run back to the house for the mustard you left on the kitchen counter.
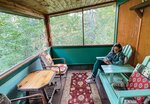
Convenience is one of the advantages of an attached screen porch, especially one that can be accessed directly from the house. An attached screen porch is really an extension of your home’s living space and it’s one that can definitely increase your home’s value. In the summertime, you’re likely to find that you’re spending a lot of your time out there. On warm summer nights, it can be a great place to sleep, particularly if you don’t have air conditioning.
Construction of an attached screen porch is a job that an accomplished DIY-er can certainly take on themselves. You’ll need two connection points on the house, a header for the roof, and a rim joist to support the floor joists. A few wall posts to hold the lower roof header that supports the outer roof edge and you’re building.
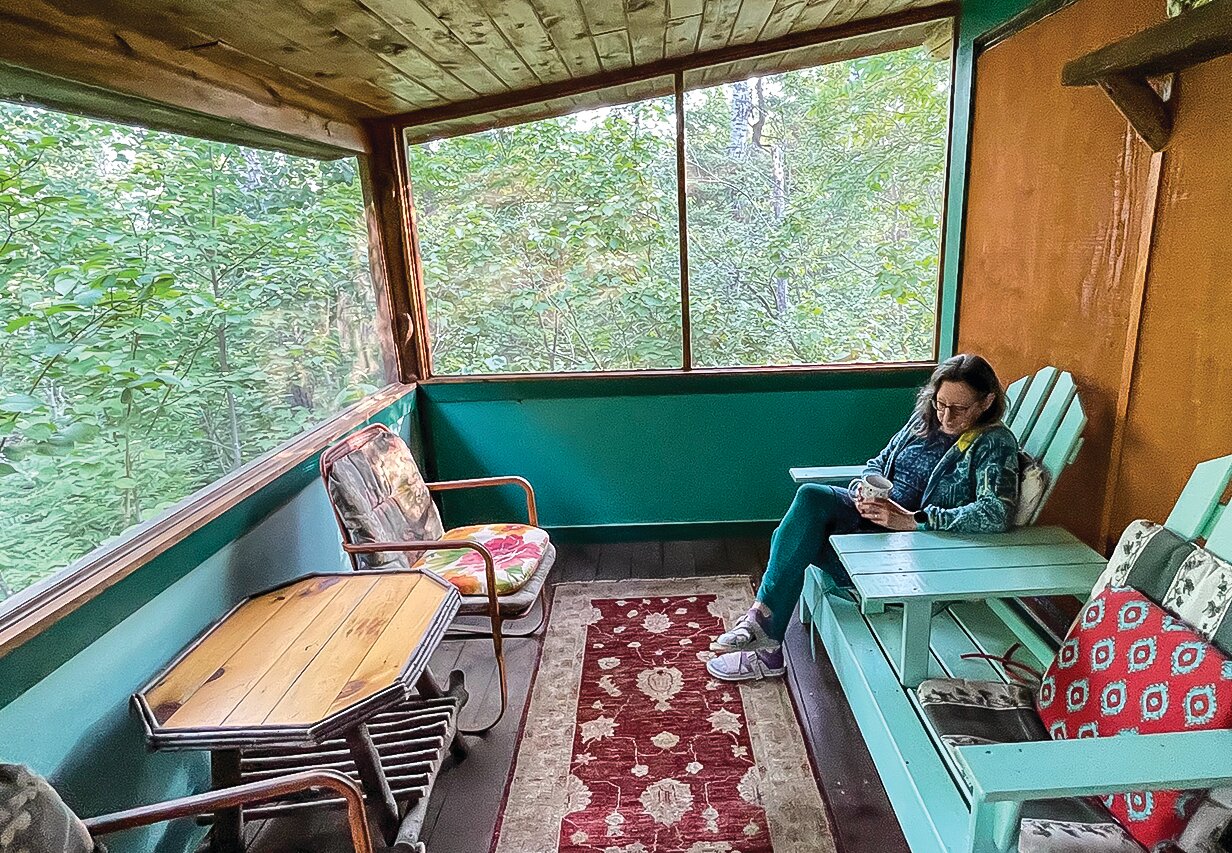
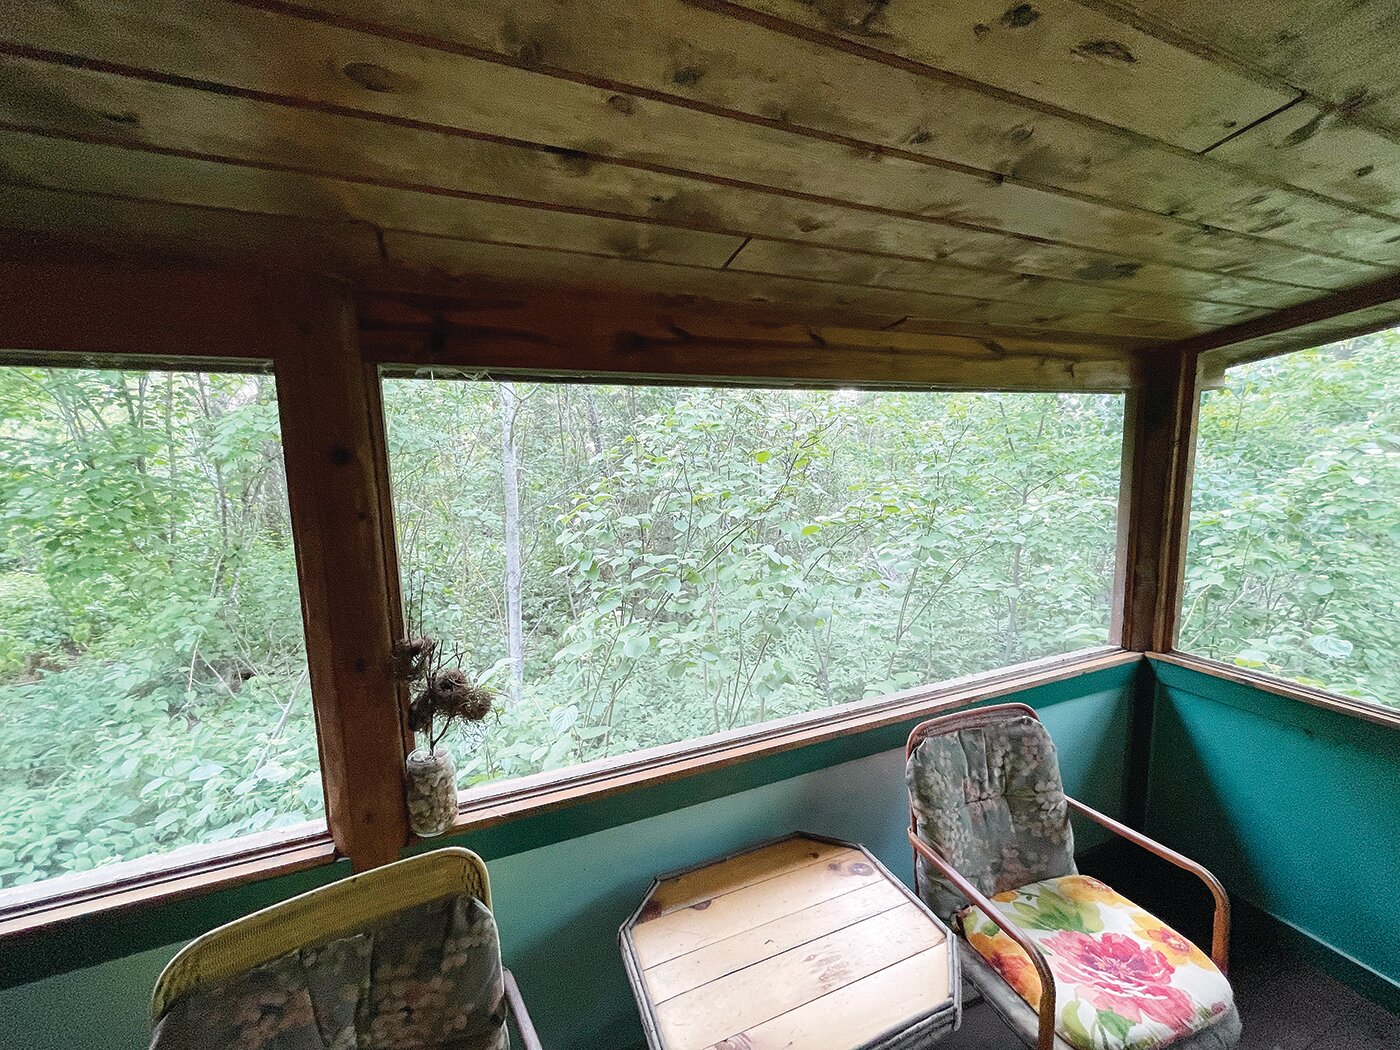
In determining the size of your porch, think about how you plan to use it. If you want a quiet place to read a book and enjoy a cup of coffee or tea on a mild morning or afternoon, you can get by with a small space. But if you’d like to enjoy an occasional meal on the porch, perhaps with friends, you’ll need more room. My screen porch is 20 feet long and ten feet deep, which is enough to have facing seating for 4-6 people, plus space for a serving table. We’ve shared many meals on the porch over the years, free from concern over the clouds of mosquitoes buzzing on the other side of the screen. For those of us who live in the woods in these parts, a screen porch provides a real sanctuary.
My screen porch is actually connected to our sauna, which is located about ten feet from the house, connected via a wooden deck. It’s not quite as convenient as a direct connection to the house, but it’s so close as to not be an issue. And it makes a nice spot to cool down after a sauna without having to slap mosquitoes in the summer months.
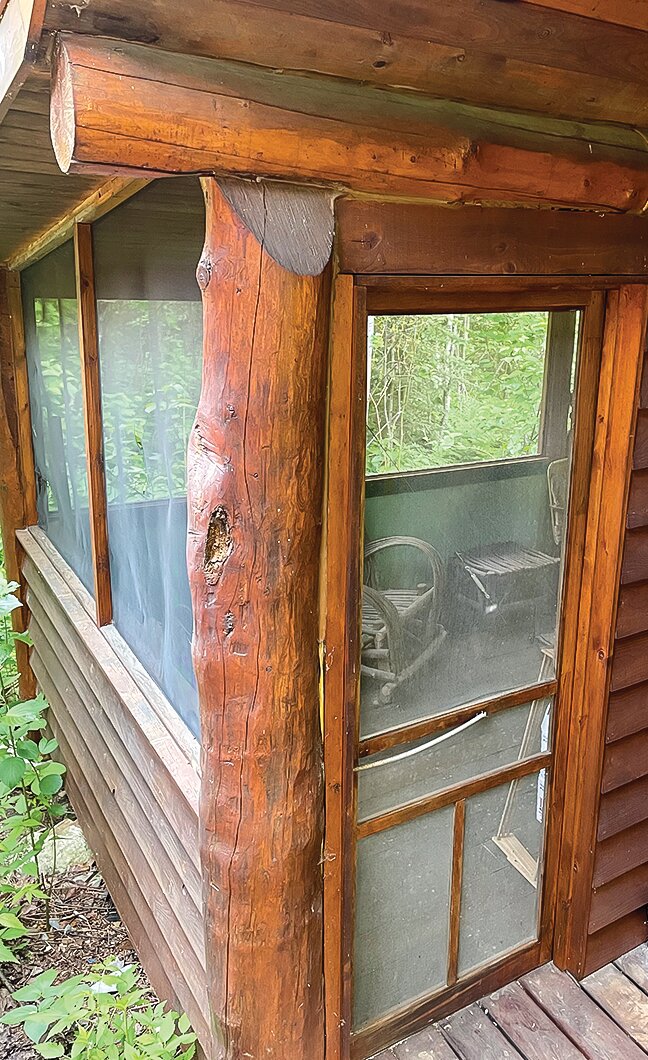
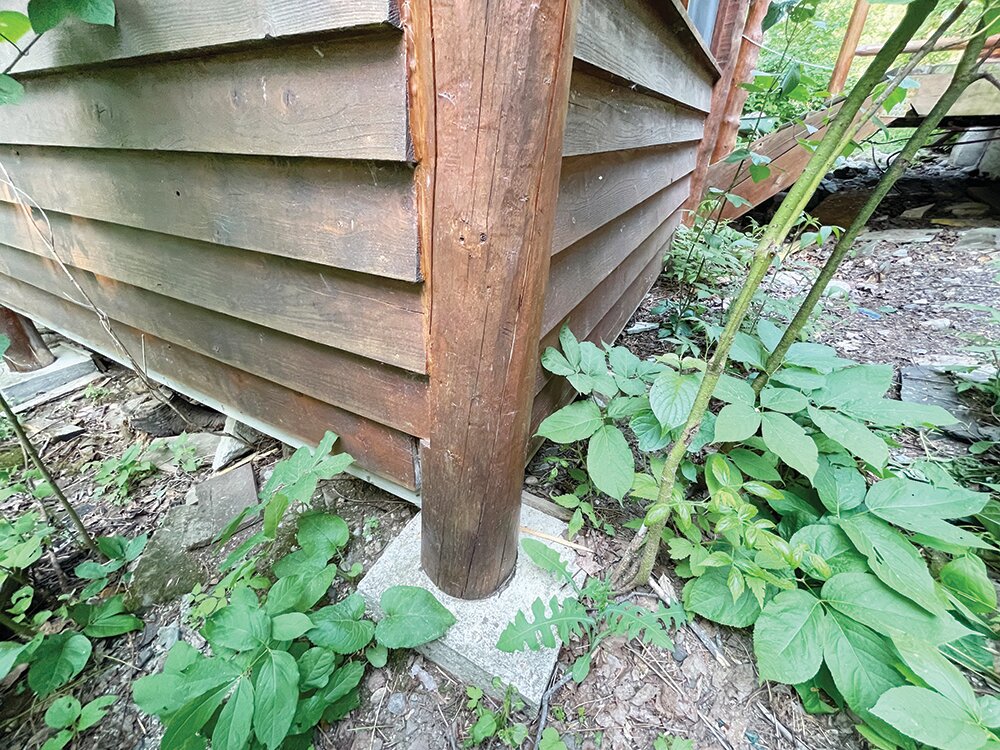
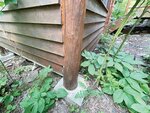
I used log posts that I cut and peeled myself as my vertical supports. I poured 18-inch square concrete pads that float on a base of compacted crushed rock and they haven’t moved an inch in 20 years. I’ve found over the years that a floating concrete pad is one of the most stable foundations you can have around here.
I set the posts right on top and tied them all together first with a rim joist at floor level and then the roof header. I used 2x6’s for both floor joists and roof joists and used some old scavenged 2x6 western red cedar boards for the floor.
I would recommend creating a stub wall rather than running screen all the way to the ground since you’re less likely to rip a hole in your screen moving furniture or cleaning, or when the dog gets excited and scratches the screen because a bunny runs by.
For tips on installing the screen, I’d recommend turning to YouTube, where you’ll find a variety of videos that show you reliable methods to properly stretch the screen to enhance its appearance and improve visibility.
Installing the screen is a big day, because it means your screen porch is ready to use. And that’s the best part of having a screen porch. Build it and enjoy it!


